Showing posts with label classroom organization. Show all posts

Saturday, January 17, 2015

A Bright Idea: Color-Coded Supply Organization!

WooHoo! It's time, once again, for the Bright Ideas Link Up... , a "commercial free" (no store links) collection of teacher-approved ideas for the classroom. I love the Bright Ideas Link Up--I enjoy spending Bright Idea Saturday morning sipping my coffee and gathering ideas to make my life easier!


I am always looking for ways to keep student supplies organized so that I don't have to run around saying "I found a pencil! Which table is missing a lime green colored pencil?!"

In my classroom, I have six table groups with six kids at each table, and there is a limited amount of space with binders, reading books, etc. We keep our textbooks on the bookshelves and we don't use the "inside" of the desks (The tables are turned around so there is no access). I don't like the way things accumulate in desks and I can't keep up with the organization necessary to support kids in keeping their desks clean. Further, we change seats throughout the day, so I need all of the supplies to always be available--no matter where students are seated for an activity.

So, we use a community supply box for the whole table. I have shared about my "dotted supplies" before...


Each table has a color, and the markers and colored pencils have dots on them. The box is dotted too! It makes things so easy to organize! (I don't dot the crayons.) My favorite time to add the dots to markers and pencils is on a road trip during the summer. It's a good way to pass the time, and the task is accomplished quickly while enjoying the scenery (I guess I should specify that this only works when I am the passenger!)


But the system is actually bigger and better. It's no secret that I am a little over-the-top when it comes to organization. (That almost makes my obsession sound like a positive trait.) You have to have matching scissors to make a system like this work. I've used a loop of paper with the dot on it... and I have chosen not to dot scissors at all. This year, everything just fell into place.

Here's what it looks like from the bottom to the top...

I use Rubbermaid snap-cases because they stay closed and stack easily. There is plenty of both lined paper and unlined paper in the bottom of the box. Kids rarely have to get up to get supplies if everything is right there within reach. (YAY! Happy teacher!)


There are six rulers. Some years I go with multiple colors... This year, I went with a one-color-per-box design. Obviously, I am going to be showing you the purple table box... Did you guess it is my favorite?


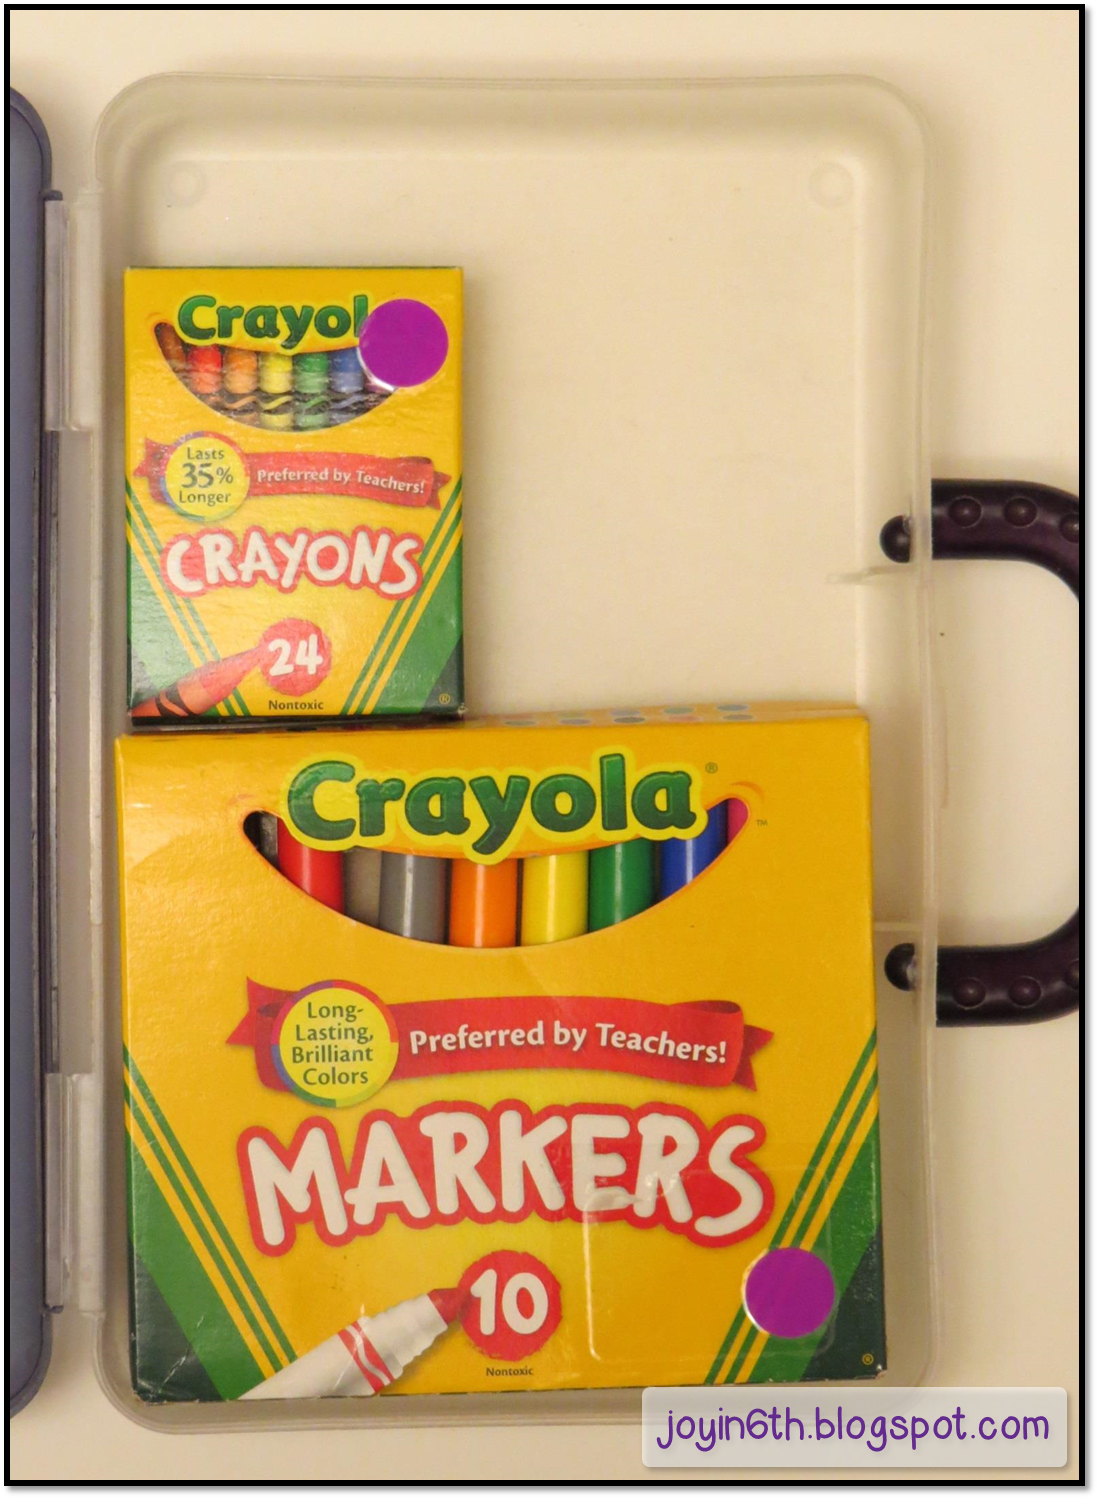
They have markers and crayons...


There are three glue sticks (partners share) a stapler and a tape dispenser. That "old fashioned film canister" (Am I THAT old?!) is filled with paper clips.


Finally, there are colored pencils and scissors. This is what the supply box looks like when you open it...


And here is what it looks like when it's closed.


Here is the "purple box." This sits in the middle of Table 4.


And here's why I love this system...
1. Everything is RIGHT THERE. We don't lose any time trying to find things. (No wandering necessary!)
2. It is SO easy to maintain. We have table captains that change each week. When it is your week, the last thing you do at the end of the day is check to make sure that your table box is organized. This is the time to refill the paper supply, or to ask for more staples.
4. Everything fits. One of our first "management lessons" during the first week of school is practicing the placement of items in the table box. We empty the box and work together to fill it correctly. Students now put things away without having to think about where each item goes.
5.  "Lost" items are reunited with their homes quickly. Kids know the box color for their table. I always chuckle (quietly, of course), when I hear a student say something like, "The green table is missing a ruler..."
6. It's pretty! I know that's not a very educationally sound reason for choosing an organizational system, but it does make my heart happy!
7. It has taught my kids self-management and cooperation. They know how to keep the supplies organized... and the communal nature of the supplies necessitates sharing. Table captains are responsible for passing out supplies for a lesson and keeping the box organized. And everyone gets a turn being responsible for the upkeep.
8. It works for us. I've used the same system for over ten years with very few adjustments!

Okay, that's probably more than enough gushing over matching scissors.

There are SO many Bright Ideas in this Link Up, you are going to need a second cup of coffee! Look at the little pictures below and choose by grade level or blogger or Bright Idea. I'll probably pass by you along the way.

Have fun! Thanks for visiting!


Saturday, August 16, 2014

A Bright Idea: Picture Book Organization

Oh, I just love to read about all of the Bright Ideas in this monthly BlogLand linky. I have collected so many tips and strategies and materials over the past few months... Haven't you? I am particularly excited about the August edition because I know I will have a list of Back-to-School ideas to consider!


My Bright Idea this month has to do with my picture book collection. I have a LOT of books--as in lots and lots and lots! I keep my picture books in "tall" boxes like these. I got the boxes at the Container Store, and almost any picture book will fit inside.


But here's what usually happens: I am running late for school (Why, Oh WHY do my stories always have to start like this?!) and I need a picture book for a lesson. I rip the top off of the first box, thumb through, no luck. Try the second box, thumb through, consider crying, still no luck. Try the third box, sigh with great exasperation and give up (or, less frequently, squeal with delight when I find what I need).

Based on this "system," I never knew which books I owned, and I was constantly buying a second copy of a book when my Amazon account said clearly, "You purchased this book...."  More than once, I said to the screen (withhold commentary, please): "Well if you're so sure I purchased this book, Where is it?!"

This madness came to an end this summer. I knew that this was the only time I would have for a picture book overhaul, so I took advantage of a few July days.

I numbered the boxes from one to six. (Coincidentally, I found that filling the boxes made them pretty heavy. I figured I got a "gym work out" every time I moved the boxes from one room to another. Well, maybe not a whole work out...)


For each box, I made an alphabetical index--and color-coded it to match the numbered label on top of the box. If I don't have my computer, I can quickly scan the indexes on the sides of the boxes to find what I need. More importantly, because I typed the list in Power Point, if I have my computer close by, I can just do a "search" for the book title and Voila! (Please say this with French accent since I can't find the accent key!) I quickly know which box to look in!


I also listed a possible focus for each of the books: nature, kindness, courage, etc. While it is not completely comprehensive (and there are a few typos and other errors), I have a system that works! I can search the document for a topic and see if I tagged any other books for use with that same topic. Compiling the Picture Book Index took a bit of time, but I did the work while watching movies, so it was fairly painless.

For many books, I took the system one step further....

When I read a blog post or track a pin to a resource about a book, I print it and put it in the back of the book. In this way, I have someone else's notes to help guide me through lesson planning.

Here's an example: Recently, I found a pin from Teaching with a Mountain View and a blogpost from Life in 4B about a book called Sierra that could be used to teach personification. I printed both and placed them inside my book.


So, how do I keep it all organized? I use sheet protectors cut in half! The "combo" looks like this...

I use The Important Book to teach a variety if different strategies every year, so I have (gulp!) three copies of the book (and now you know why!) (Click the pic to add a copy to your own library)


I know that my sweet blogfriend,Stephanie, from Teaching in Room 6 uses this book too. I found her blog post about the book, printed it, and placed in a "pocket" at the back of the book.  Now I can see Stephanie's notes when I take out the book to use it in my classroom.


And if you know me at all, you know that the pocket is not affixed crocked--even though it looks that way. When I propped it open (with a book of crayons!) to take the picture, the photo came out wonky-looking. Just had to set the record straight (heeheehee).

One of my absolute favorite sources for picture book commentaries is Barbara Gruener from The Corner on Character. I always love her ideas and she presents them in such a wonderful way! Here's my copy of Stellaluna... (Click the pic for a link to Amazon)

https://www.amazon.com/Stellaluna-Janell-Cannon/dp/0152802177/ref=sr_1_1?ie=UTF8&qid=1483852056&sr=8-1&keywords=stellaluna+book

And here are Barbara's notes, tucked neatly into the "pocket" at the back of the book. I use a few small pieces of double stick tape to hold the pockets, and my notes stay right where I can find them.


It is so... refreshing... to have everything together in one place. I am forever spending my time trying to find "missing pieces" when I am trying to plan. Having the books and notes together will save me a lot of time. And having a Picture Book Index will ensure that I can find the right book in the right box without exasperation or tears.

Just look at all of the Bright Ideas listed in the Link Up below! The authors have listed a grade range--and most have listed a topic to guide your browsing. I just know you're not going to want to miss any of them!

If you enjoyed this bright idea, I'd love it if you linked up with me on Bloglovin, Facebook, or Pinterest.


Sunday, August 10, 2014

Thinking About Getting Ready... Notebook Dividers

After blogging for three years, I am finally figuring out how everything fits together! All in the same day, I blogged about something and put a photo on Instagram and added a post on facebook. I opened a Twitter account as well, but anyone who knows me is aware that being succinct is NOT my best skill! Twitter will just have to wait.

I can't convince myself to do any "big planning" yet--although I feel like I have been thinking about those plans for weeks. However, I do love all those "little tasks" that are necessary before the start of a new school year. Scissors, paper cutter, printer, cardstock... check!

I make binders for my students each year. Some of my students have binders of their own, but many do not, so we have an "official" Sixth Grade Binder with everything they need to stay organized. I'll post about the binders in a week or two, but today's task was making the little divider tabs that separate the subjects in the notebook.


I have gotten pretty efficient at the process over the years. First I print the tabs.


Then I cut them out.


Then I score and fold the tabs so they fit nicely into the dividers. I've tried a lot of different tools, but the one that works best for me is still a "t-pin." Oddly, I've had the same t-pin for years and years. Funny, I can't always find two shoes that match, but I can find an ages-old t-pin in minutes when it is time to complete this project!


After I score the tabs, I fold them and stack them into little tents, so everything is in reach and in order.


Last, I put the tabs into the dividers so that I can add each group into a binder.


Having a set of class binders really helps keep everything organized in my classroom. I'll admit: It is as much for me as it is for my students. Papers stay organized and the responsibility for keeping track of things is shifted from my shoulders to theirs. It just works for us.

There is a lot going on in the week ahead! Cue shark music... (You're singing it aren't you? DaaaaaDuh....)


Starting Monday, Jenny from Luckeyfrogs Lilypad has organized a group of bloggers for a bloggy link up filled with shark-infested freebies! I hope you'll come back and check it out!

And even though I posted this yesterday (a Sunday), I am linking up with my Dearly-Loved Friend, Tara at 4th Grade Frolics.
http://4thgradefrolics.blogspot.com/2014/08/monday-made-it-my-summer-is-gone.html
Last time I posted my Monday Made It on a Tuesday. This time it was on a Sunday. In my little brain, +1 + -1 + 0... I'm sort of even (Which sounds a whole lot better than being sort of zero!) Click on the button above to take you back there if that's where you started!


Sunday, March 9, 2014

A Bright Classroom Management Idea: Number The Spots

I am so excited to be participating in the SECOND Bright Ideas Blog Hop! This is a special kind of Hopping Party: It's not about advertising TpT items or linking up to other products or printables. It IS about sharing good, solid strategies and ideas that are working in real classrooms.


 This time around, Shelley Grey from Teaching in the Early Years has organized over two hundred bloggers spanning the grade levels and content areas... so there is certain to be "something for everyone." Shelley has done an amazing job organizing us all. And I am truly excited to share my "Bright Idea" with you today!


I hate to admit that it often takes me a long time to learn things. I have tried a lot of organizational strategies over the years, with varied success, but once I implemented this one, my whole life got easier. That probably sounds overly dramatic, but it is, indeed, true.

Recently, I had to survive without my table numbers. Things were miserable and I couldn't wait to get them put back into place once again.

Now, I'm not talking about "table numbers" in the traditional sense. I currently have 34 kids, but I always set up for 36 kids. We have often "visitors" fora variety reasons or sometimes a student needs a more "comfortable" chair during an activity. I have groups of students at desks... three two-person tables making a total of six kids grouped together. And I have six table groupings which I call (cue drum roll...) Table 1, Table 2, Table 3... Okay, I think you get the idea. Like many teachers, I even have a number hanging above each table.  But that is not what I am talking about in this post.


I am talking about the numbers that are actually on each kid's desk. Every student's desk "spot" is numbered 1, 2, 3, 4, 5 or 6. (There are two kids to a table, but they each have a numbered "spot.") We work at different tables all day--but that doesn't change things, because it's the spot that is numbered, no matter who is sitting there or what we are doing. By the way, until I wrote this post, I never knew how hard it would be to photograph the corner of a desk. Yaaaawwwnnn! It is less than thrilling to look at, but it IS important to this discussion!


And this is so easy to implement! If you are not color-crazy like me, you can skip down to the picture with the number on the white board. If color matters in your decor choices, read on!

First I ran off the numbers... 1 through 6 on a page. I hated to waste the extra space so I added a little affirmation in the corner. Every August when I print them up again, I get a cheerful little reminder! (Is it scary that I am still surprised to see it each year?) By the way, those are Jen Jones fonts and frames. Don't you just love Hello Literacy?!


When you cut up the page, you have six numbers of one color...


But that is not the plan! Most of you know that I am a little...ummmm... obsessive... when it comes to colors. I have six table groups and six "spots," so I run off the numbers on six colors. These are the colors in my room: purple, magenta, turquoise, and bright blue... with a few dashes of lime green and and occasional hint of orange. And these colors are reflected in my table numbers. Every table has all six numbers and all six colors... but at each table the same number is a different color. (Just think 6 x 6 if you want to get "mathy" about it). It doesn't matter if this description doesn't make sense. This is not a Common Core math word problem. Relax. Just go with it... (And I am sure that if the whole table had the same color--or even if every single "spot" had the same color, the system would work just as well!)


Then I cut up some Contact paper, just slightly larger than the size of the numbers. I know contact paper is a bit "old school," but it works great in this situation. If you cut the Contact paper large enough and get a good seal, the kids are less likely to pry up the numbers. The Contact paper keeps the numbers on the table. It potects the numbers from being torn (or written on). And it helps keep the colored paper from "running" if the desks are being cleaned or there is something liquid on the table.


The Contact paper I have is made by the official "ConTact" manufacturer (or so I'm guessing!) It is very durable and it sticks well to the desks. It also has grid lines which makes cutting the rectangles a snap. I used my paper cutter because... well, just because, but, with the grid lines, scissors would probably work too! I like to cut them all at once. And I always cut extras because I either mess up when I am affixing them to the desks or some calamity occurs and I have to replace the numbers. I keep a set of extra numbers too!

Then I mix up the numbers. As I said, the color of each number varies from table to table. And I like to arrange them randomly. The kids spend a lot of time wondering about my system. Here's the truth: I don't have a system. I just don't like to have the blue number from table 1 next to the blue number from table 2... etc. It is a bit like a classroom Sudoku puzzle, and it is fun to do when your To Do list is lengthy and you just can't face anything else you're supposed to be doing! Also, my tables have rounded corners, so I cut one corner on the diagonal so that it fits across the rounded edge and doesn't lift up as easily.


In the end, it looks like this. I couldn't get a "sky shot" of my room, so I had to just "go graphic." Now imagine six table groupings that look just like this...


So why is this helpful???

Because... this is one of the best management systems I have ever used!

Each week, it is another "number's" responsibility to make things work in our classroom. In the picture below, you can see it is #4's week. 


So, if you are sitting at the spot in your table grouping with #4... You have sooooooooo much to do! And I can relinquish responsibility for about 23 tasks... which builds responsibility into the classroom AND keeps everything humming smoothly. I think we are at Day #112 at my school. At this point, there are so many things that happen without me thinking--or even asking.

For the list to make sense, you need to know that we have supply boxes on our desks filled with the supplies that we need throughout the day. If, for example, we needed scissors, and I was foolish enough to say, "Please get a pair of scissors for the next activity..."I KNOW there would be 34 sets of hands (that's 68, if you are counting!) grabbing for scissors. Even with warnings and pleas, I have seen this simple request turn into a nightmare. Now I say, "If you are sitting at spot 4, please pass out scissors to the people at your table." The table numbers reduce the scenario to one set of hands per table...and life goes on happily!

What else do we use the numbers for? Anything that needs to happen for six kids and can be accomplished with the help of just one. Just yesterday I am sure I asked...


And those are just the things I could think of at the moment. Because students have the responsibility for a week at a time, things fall into place quickly. Then I change the "big number" Friday afternoon, I announce it on Monday morning when we take on new classroom jobs for the week, and the responsibility shifts to the next number.

For years, I chose a student at each table by a descriptor such as: If you are the one with the most pockets, the earliest birthday, the tallest, the least tall, the one wearing the most colors, ETC. That's sort-of-fun for the first week... and then I find that all of that thinking takes more time than the lesson I have planned! Now I just say, "Number 6, please get a basket of algebra tiles for you and your tablemates," and we quickly transition to the next lesson.

Ahhhh. Contented sigh. I've been wanting to share this strategy for a while. Maybe you already do this and I am the only one tardy to the party. I think it work just as well in a small class (5 tables of 4, for example) because one of the benefits is that it limits the number of kids out of their chairs and reduces the number of students asking, "Can I help?"

I am glad I have this system in place. I know it has saved me plenty of time and more than a few headaches! Thanks for listening to me ramble on about it!

I am guessing you are now READY to hop over to your next stop...

Angela at the Daily Alphabet is talking about an easy math focus! Her blog is always filled with fun-to-read posts and I just know you are going to love her Bright Ideas about number sense. Just click on that cheery button below to take you there!

http://dailyalphabet.blogspot.com/

Or, if you are in more of a "random" mood at the moment, just click on any of the links below! Wishing you a wonderful time along the way as you meet some new bloggers and gather some great new "Bright Ideas"!

Thanks SO MUCH for stopping by! And thanks to Amy Alvis for the background paper!


Monday, September 2, 2013

Day 2...The Night Before...

After all of these years, I am still nervous the night before the first day of school! I am worrying that I will forget something. Or forget to do something. Or forget how to do something...
Butterflies by Fancy Dog Studio HERE on TpT
 Yep... Those butterflies are starting to flutter in my stomach...

Already I am starting the day at a disadvantage... My Promethean Board won't "power up." I was lunging at it from every direction with the remote... but to no avail. So it's chart paper and lots of demonstrations for us tomorrow.

I spent far too much time this evening trying to come up with 35 jobs. In my room, we take that "work together" concept seriously. Everyone has a job and it takes all of us doing our part to make things run smoothly.

Here's what I have so far. I always take suggestions from the kids and revise the list to include those jobs for which they can provide reasonable rationale. Jobs take place throughout the day, but we have a "job time" at the end of the day and everyone completes jobs left unfinished and signs out to show that they have completed the task for which they are responsible. On days when we run short on time, the students are always anxious to do their job and sign out. Quite often, they are more determined than I am to be finished and accountable! (Don't you just love that about kids?!)

It's close to midnight and I still have seven things on my To Do list, so I will wish all of the School-Starts-the-Day-After-Labor-Day folks a happy First Day. And to those who have been back for a while... Happy 4-Day Week!

I have butterflies in my stomach and a serious case of The Eve of the First Day Jitters...

Tomorrow is the First Day of School!


Saturday, August 31, 2013

Day 4... Trash Talkin'

I think Pinterest is haunting my dreams!

One of the first items I ever pinned was this:

{source}
Whenever, I would look at my Pinterest boards, this was always the first pin that would catch my eye. Last week, I was having a back-to-school dream, and there was a polka dotted trash can in my just-a-dream room. But the reality was: I really wanted a trash can like that!

For years, I had one purple and one magenta trash can. There were big cylindrical cans--just right for a big class--and, of course, the perfect colors for my room.

Time got the best of them, however, and, after years of devoted service, they both cracked. I tried glue. And tape. And I can strongly suggest against both options.

I searched for a looooooooong time for a another colorful replacement, but the best I could come up with was black. In fact, I never really did see many other suitable-for-the-classroom options besides black, white and various shades of red.

So, for a year, I suffered in a state of trash-can-boredom with my plain back cans. And then Pinterest came along...

After pinning that picture, I was determined to buy a Cricut. Or a Cameo. Or both. I needed circles. Thankfully, those purchases didn't happen, because I have since decided that crafts just aren't in my future. However, I DID find these...

{Source}
These are circular decals. And I found them in PURPLE! And they are available in LOTS of other colors too. Click on the picture to see some options at this site. They have sales all the time!

And, happily, JOYFULLY even, I now have two trash cans that look like this!

I think I should have taken the picture without the bag... but you know that this is an authentic picture because the can is nearly full after a day spent readying my classroom. (And you can tell it is a public school by the so-sad baseboards and the who-would-pick this-color aqua tile!)

I just love my trash cans. Sometimes it IS the littlest thing that can make a teacher happy...