Showing posts with label Bright Ideas. Show all posts

Saturday, August 16, 2014

A Bright Idea: Picture Book Organization

Oh, I just love to read about all of the Bright Ideas in this monthly BlogLand linky. I have collected so many tips and strategies and materials over the past few months... Haven't you? I am particularly excited about the August edition because I know I will have a list of Back-to-School ideas to consider!


My Bright Idea this month has to do with my picture book collection. I have a LOT of books--as in lots and lots and lots! I keep my picture books in "tall" boxes like these. I got the boxes at the Container Store, and almost any picture book will fit inside.


But here's what usually happens: I am running late for school (Why, Oh WHY do my stories always have to start like this?!) and I need a picture book for a lesson. I rip the top off of the first box, thumb through, no luck. Try the second box, thumb through, consider crying, still no luck. Try the third box, sigh with great exasperation and give up (or, less frequently, squeal with delight when I find what I need).

Based on this "system," I never knew which books I owned, and I was constantly buying a second copy of a book when my Amazon account said clearly, "You purchased this book...."  More than once, I said to the screen (withhold commentary, please): "Well if you're so sure I purchased this book, Where is it?!"

This madness came to an end this summer. I knew that this was the only time I would have for a picture book overhaul, so I took advantage of a few July days.

I numbered the boxes from one to six. (Coincidentally, I found that filling the boxes made them pretty heavy. I figured I got a "gym work out" every time I moved the boxes from one room to another. Well, maybe not a whole work out...)


For each box, I made an alphabetical index--and color-coded it to match the numbered label on top of the box. If I don't have my computer, I can quickly scan the indexes on the sides of the boxes to find what I need. More importantly, because I typed the list in Power Point, if I have my computer close by, I can just do a "search" for the book title and Voila! (Please say this with French accent since I can't find the accent key!) I quickly know which box to look in!


I also listed a possible focus for each of the books: nature, kindness, courage, etc. While it is not completely comprehensive (and there are a few typos and other errors), I have a system that works! I can search the document for a topic and see if I tagged any other books for use with that same topic. Compiling the Picture Book Index took a bit of time, but I did the work while watching movies, so it was fairly painless.

For many books, I took the system one step further....

When I read a blog post or track a pin to a resource about a book, I print it and put it in the back of the book. In this way, I have someone else's notes to help guide me through lesson planning.

Here's an example: Recently, I found a pin from Teaching with a Mountain View and a blogpost from Life in 4B about a book called Sierra that could be used to teach personification. I printed both and placed them inside my book.


So, how do I keep it all organized? I use sheet protectors cut in half! The "combo" looks like this...

I use The Important Book to teach a variety if different strategies every year, so I have (gulp!) three copies of the book (and now you know why!) (Click the pic to add a copy to your own library)


I know that my sweet blogfriend,Stephanie, from Teaching in Room 6 uses this book too. I found her blog post about the book, printed it, and placed in a "pocket" at the back of the book.  Now I can see Stephanie's notes when I take out the book to use it in my classroom.


And if you know me at all, you know that the pocket is not affixed crocked--even though it looks that way. When I propped it open (with a book of crayons!) to take the picture, the photo came out wonky-looking. Just had to set the record straight (heeheehee).

One of my absolute favorite sources for picture book commentaries is Barbara Gruener from The Corner on Character. I always love her ideas and she presents them in such a wonderful way! Here's my copy of Stellaluna... (Click the pic for a link to Amazon)

https://www.amazon.com/Stellaluna-Janell-Cannon/dp/0152802177/ref=sr_1_1?ie=UTF8&qid=1483852056&sr=8-1&keywords=stellaluna+book

And here are Barbara's notes, tucked neatly into the "pocket" at the back of the book. I use a few small pieces of double stick tape to hold the pockets, and my notes stay right where I can find them.


It is so... refreshing... to have everything together in one place. I am forever spending my time trying to find "missing pieces" when I am trying to plan. Having the books and notes together will save me a lot of time. And having a Picture Book Index will ensure that I can find the right book in the right box without exasperation or tears.

Just look at all of the Bright Ideas listed in the Link Up below! The authors have listed a grade range--and most have listed a topic to guide your browsing. I just know you're not going to want to miss any of them!

If you enjoyed this bright idea, I'd love it if you linked up with me on Bloglovin, Facebook, or Pinterest.


Saturday, May 17, 2014

Bright Idea: "Laptop Kits" to Keep Computer Supplies Organized

WooHoo! I'm so excited to be participating in the Bright Ideas Link Up once again!  And with so many bloggers linking up together, it's like an Idea Buffet!


This month I am sharing a strategy that allows students to keep their computer "supplies" organized...

Every May, as the school year begins to draw to a close, I am reminded about the "systems" we have in place in our classroom. Some are extravagant and some are simple--but combined, these systems help keep things running smoothly.

One simple system that works well in our classroom is the use of our "laptop kits." 

We are lucky to have a computer cart with thirty-four netbooks. They are now five years old and increasingly slow, but students still spend time on the computers almost daily. The computers are kept in a big, blue cart.


After a bit of training, students can access the computers independently, and they develop and use their technology skills on different websites and with different programs. Because students are often using programs with sound--alongside other students who are having a Book Club discussion or who are working with a teacher in a small group--they need to have a set of earphones or earbuds that can remain at school. I encourage them to have an inexpensive pair; nothing fancy is needed for our purposes.

This is where the Bright Idea comes in. Since my students change seats throughout the day depending on the subject or activity, we don't use the desks for storage. They keep their textbooks on shelves, they keep their papers in their binders, and they store things communally using plastic boxes for books and other supplies.


When we started using laptops, it was obvious that students would need a way to store their "gear." The system needed to be accessible, and easy, and literally, at their fingertips. "Laptop kits" were the obvious solution!

I use small heavy duty "zip lock"-type baggies. These have survived the whole year without a single calamity. Each bag has a brightly colored label, making it easy for the students to differentiate their bag from other students' bags.


Inside the bag are the components necessary for students to work successfully (and independently) on the netbooks.


Some students have traditional headphones (These won't fit in the bag.  Darn!), but most have a pair of earbuds--of every color imaginable. And last week, one of my students arrived with a pink glitter set and another had a pair with tiny monkeys! I try to find a few extra sets on sale in the summer and use them for drawings, prizes, and rewards--especially for those who cannot supply a set on their own. Some students also use a wireless mouse, so this goes into the kit--and the part that fits into the USB port goes in the little envelope.
   

The students have an ID code and a password that follows them through their school years. Students usually memorize these quite quickly (or arrive in sixth grade knowing them). However, students also have access to other programs and sites that require passwords.


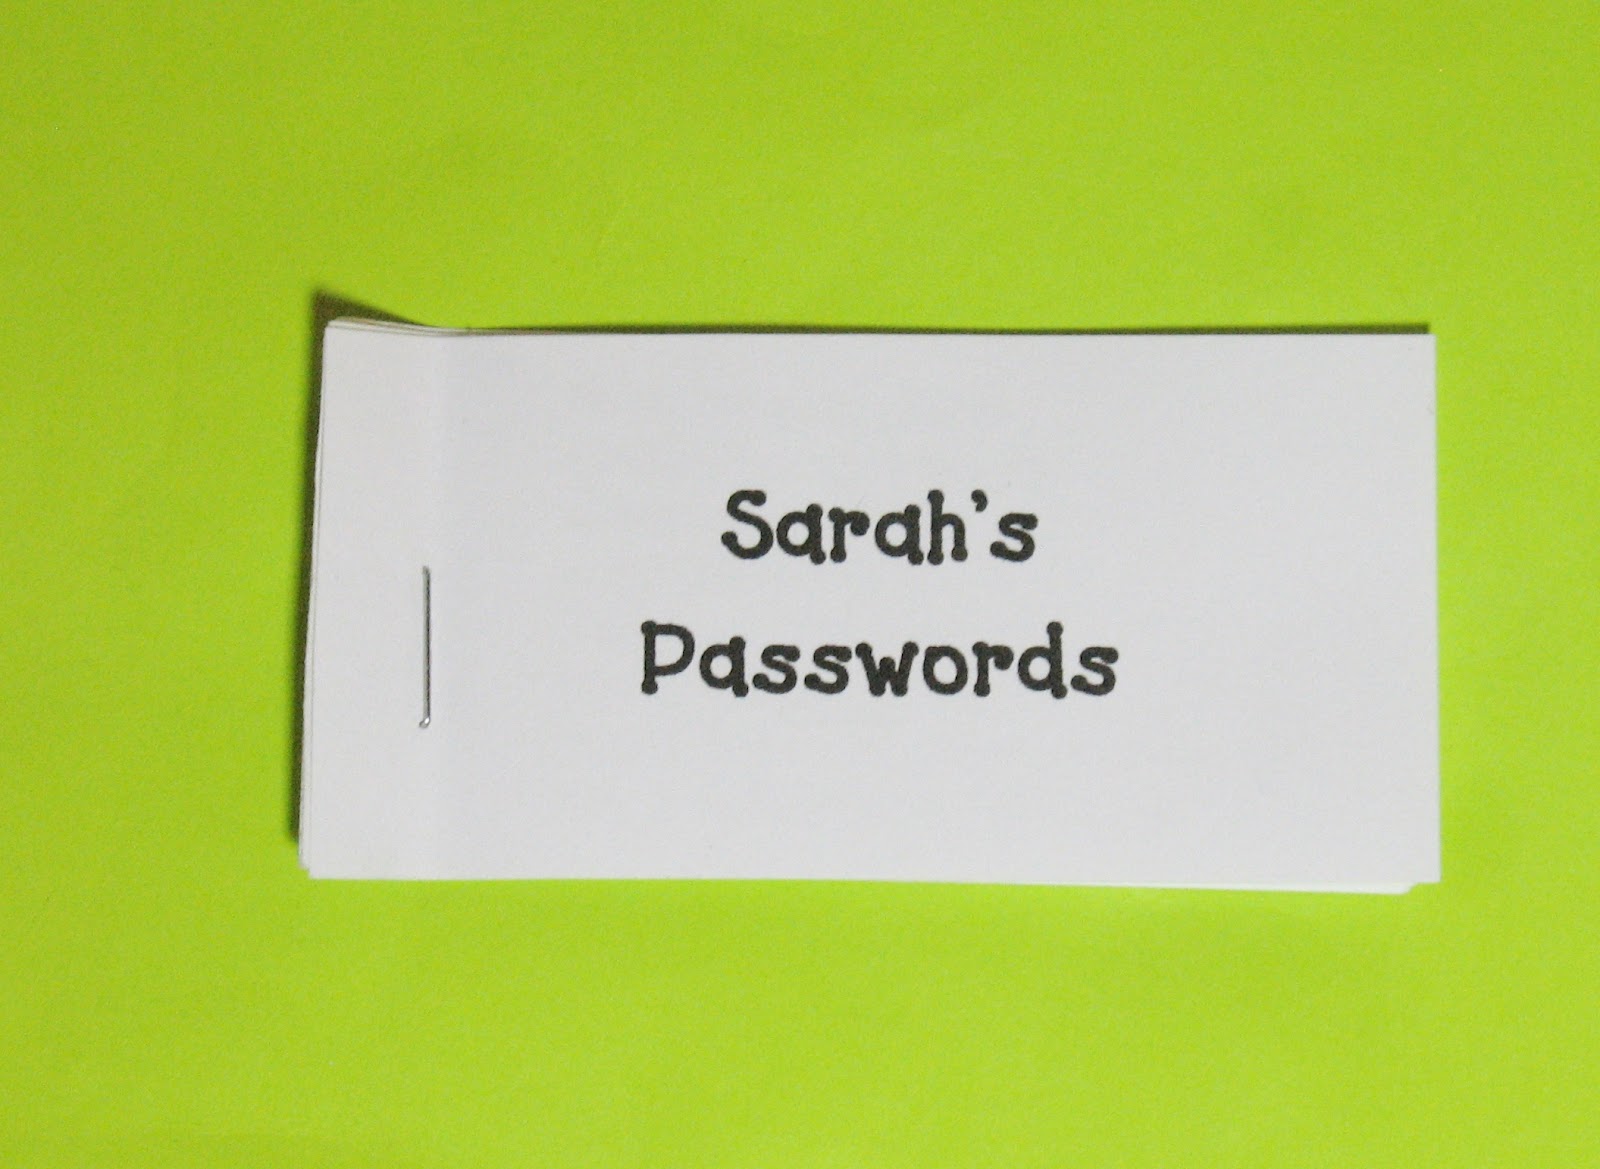
Although they try to remember them, some passwords are forgotten or are simply to complicated to memorize. This system helps students locate the information quickly--without interrupting the teacher! I staple the passwords together with the students' names on top to keep them private--but also to keep them all in one place! The password sets are stored in the students' laptop kits as well.

And WHAT is this?


Likely your first guess was right: It's a baby sock! Our netbooks have a hard plastic screen and I continue to be astonished by the amount of dust and fingerprints (etc!) that can accumulate on a computer screen. Two fingers fit perfectly in the sock, and, now and then, a gentle wiping up allows the students to see the screen a bit better. This is not an option for many screen types, but for ours, it's a perfect match.

Here is Sarah's laptop kit safely stored in one of the table boxes for Table 2.


This system is a little more hygienic than storing the earbuds/earphones all together--and we needed a system that wouldn't create a traffic jam at another point in the room. The laptop kits have worked well for us--and it is rare for things to be lost. That fact alone leaves the teacher smiling at the end of the day!

I think the "kit" system could just as easily be used if the baggies were stored in students' desks or transported to/from the computer lab.

Like you, I am ready to start clicking on the links below. There are Bright Ideas from more than a hundred different bloggers, please browse through and choose a topic or grade level that interests you.

Thanks for stopping by. Happy Reading!


Saturday, April 12, 2014

A Bright Idea: Getting Dotty with Supplies

Yippee! It's another day to share tips and strategies as a part of the Bright Ideas Link Up! On this round, we are switching from a "hop" to a "link up," so you can scroll down and look at the options at the end of this post. Bloggers have listed their "Bright Idea" on the button along with the applicable grade levels of the post--so you can choose that way... or just click on something that looks interesting!


I have six table groupings in my room, with six students in each group. This year there are thirty-five sixth graders in our classroom, so there is little room to spare. Throughout the day, students change seats often. Depending on the activity, they can be found sitting at one of the six tables--or at an assortment of extra locations around the room. We are more-than-crowded in our little room with kids and books, and it is difficult for students to bring all of their "supplies" with them every time they move to another table grouping. Consequently, we use shared supply boxes in my classroom and it has been an effective system in my room for many years.

But it was not a system completely without difficulties. For years, I would find myself frustrated when an item would be on the floor and I would be asking (more than once): "Which table is missing a blue marker?" or some variation of that question.

Fortunately, that all changed when I employed the dot system...


The supplies for this system are minimal. I have six tables groupings, so I need six colors of adhesive dots. I generally use blue, green, orange, pink, yellow and red, but those colors don't all come in one package. This year, I found the neon dots at the 99¢ Store and the Avery dots were calling my name at the local office supply store. And later, I found a package that had "dark pink" dots that look almost purple (if you dim the lights and squint a little). Be still, my heart! Luckily, I use the leftover colors to label books in my classroom library, so nothing is wasted.

The final requirement is a package of pre-cut tape strips. These are often packaged with an around-your-wrist band or a small round dispenser to make it easier to grab hold of the tape. Of course, you can use "regular" tape instead, but these tape pieces are already all the same size. No thinking involved. I find "regular" tape dispensers to be a little...ummm... unreliable. Before finding these, I would often end up looking like an episode of I Love Lucy with tape wrapped around my wrist or in my hair. And halfway through the first box of markers, I was already less-than-delighted with the whole process...

Our "table boxes" have markers, colored pencils and crayons (along with some other non-dot-worthy items). See those green dots? Those are my pathway to sanity...


Here are the markers from the green table box...


And here are the colored pencils...


 And here are the crayons...


Hey! No dots! Truth: I used to put dots on the crayons too. Now I buy my crayons for twenty-five cents at WalMart during the Back-to-School sale. I am simply not going to work that hard to keep track of crayons! I usually buy an extra box or two of crayons to have on hand if a student cares enough to go searching for a missing color. So, you see, I haven't completely lost my marbles (close, but not completely!) But it is rare that we lose markers or colored pencils!

I can usually get all of the supplies "dotted" during one (at home) movie. More than once, I have dotted up the supplies during a long car ride in August. I also add dots to the marker and colored pencil boxes, and I double reinforce the "flaps" with tape so that they will last through the year. It's a little investment in time during the summer that carries us all the way through June.

The supplies are kept in a box on top of the table. If the group moves to floor, the whole box goes with them. I got a lot smarter when I put the dot on the outside of the supply box too! Now, if I find a missing marker, I scan the room for the box with green dot, and I know where I will find the marker-box-missing-one.


Recently, the students figured out that the whole table has a color too! Table two is green. The sign hanging above it is green. The book box is labeled green too. This is important because it lets a visitor know which table is table two. 


Okay, here I have a little confession: "Green" is not really a color in my room. That table is actually turquoise which matches my room colors. But until the "dot people" come up with turquoise (or purple!) dots, we have to fudge just a little.

I have also used these dots to mark "sets" of things--even the backs of puzzle pieces! It's just an easy way to re-connect a missing item to the rest of the set!

So that's the Bright Idea from my classroom. If you scroll down just a little, you will see a link-up to enjoy more Bright Ideas from over other 150 bloggers. I hope you brought your sunglasses, because that's a lot of brightness! Click on the links to browse by topic or grade... or just discover a new blogger!

Have fun... and thanks for visiting!


END

Sunday, March 9, 2014

A Bright Classroom Management Idea: Number The Spots

I am so excited to be participating in the SECOND Bright Ideas Blog Hop! This is a special kind of Hopping Party: It's not about advertising TpT items or linking up to other products or printables. It IS about sharing good, solid strategies and ideas that are working in real classrooms.


 This time around, Shelley Grey from Teaching in the Early Years has organized over two hundred bloggers spanning the grade levels and content areas... so there is certain to be "something for everyone." Shelley has done an amazing job organizing us all. And I am truly excited to share my "Bright Idea" with you today!


I hate to admit that it often takes me a long time to learn things. I have tried a lot of organizational strategies over the years, with varied success, but once I implemented this one, my whole life got easier. That probably sounds overly dramatic, but it is, indeed, true.

Recently, I had to survive without my table numbers. Things were miserable and I couldn't wait to get them put back into place once again.

Now, I'm not talking about "table numbers" in the traditional sense. I currently have 34 kids, but I always set up for 36 kids. We have often "visitors" fora variety reasons or sometimes a student needs a more "comfortable" chair during an activity. I have groups of students at desks... three two-person tables making a total of six kids grouped together. And I have six table groupings which I call (cue drum roll...) Table 1, Table 2, Table 3... Okay, I think you get the idea. Like many teachers, I even have a number hanging above each table.  But that is not what I am talking about in this post.


I am talking about the numbers that are actually on each kid's desk. Every student's desk "spot" is numbered 1, 2, 3, 4, 5 or 6. (There are two kids to a table, but they each have a numbered "spot.") We work at different tables all day--but that doesn't change things, because it's the spot that is numbered, no matter who is sitting there or what we are doing. By the way, until I wrote this post, I never knew how hard it would be to photograph the corner of a desk. Yaaaawwwnnn! It is less than thrilling to look at, but it IS important to this discussion!


And this is so easy to implement! If you are not color-crazy like me, you can skip down to the picture with the number on the white board. If color matters in your decor choices, read on!

First I ran off the numbers... 1 through 6 on a page. I hated to waste the extra space so I added a little affirmation in the corner. Every August when I print them up again, I get a cheerful little reminder! (Is it scary that I am still surprised to see it each year?) By the way, those are Jen Jones fonts and frames. Don't you just love Hello Literacy?!


When you cut up the page, you have six numbers of one color...


But that is not the plan! Most of you know that I am a little...ummmm... obsessive... when it comes to colors. I have six table groups and six "spots," so I run off the numbers on six colors. These are the colors in my room: purple, magenta, turquoise, and bright blue... with a few dashes of lime green and and occasional hint of orange. And these colors are reflected in my table numbers. Every table has all six numbers and all six colors... but at each table the same number is a different color. (Just think 6 x 6 if you want to get "mathy" about it). It doesn't matter if this description doesn't make sense. This is not a Common Core math word problem. Relax. Just go with it... (And I am sure that if the whole table had the same color--or even if every single "spot" had the same color, the system would work just as well!)


Then I cut up some Contact paper, just slightly larger than the size of the numbers. I know contact paper is a bit "old school," but it works great in this situation. If you cut the Contact paper large enough and get a good seal, the kids are less likely to pry up the numbers. The Contact paper keeps the numbers on the table. It potects the numbers from being torn (or written on). And it helps keep the colored paper from "running" if the desks are being cleaned or there is something liquid on the table.


The Contact paper I have is made by the official "ConTact" manufacturer (or so I'm guessing!) It is very durable and it sticks well to the desks. It also has grid lines which makes cutting the rectangles a snap. I used my paper cutter because... well, just because, but, with the grid lines, scissors would probably work too! I like to cut them all at once. And I always cut extras because I either mess up when I am affixing them to the desks or some calamity occurs and I have to replace the numbers. I keep a set of extra numbers too!

Then I mix up the numbers. As I said, the color of each number varies from table to table. And I like to arrange them randomly. The kids spend a lot of time wondering about my system. Here's the truth: I don't have a system. I just don't like to have the blue number from table 1 next to the blue number from table 2... etc. It is a bit like a classroom Sudoku puzzle, and it is fun to do when your To Do list is lengthy and you just can't face anything else you're supposed to be doing! Also, my tables have rounded corners, so I cut one corner on the diagonal so that it fits across the rounded edge and doesn't lift up as easily.


In the end, it looks like this. I couldn't get a "sky shot" of my room, so I had to just "go graphic." Now imagine six table groupings that look just like this...


So why is this helpful???

Because... this is one of the best management systems I have ever used!

Each week, it is another "number's" responsibility to make things work in our classroom. In the picture below, you can see it is #4's week. 


So, if you are sitting at the spot in your table grouping with #4... You have sooooooooo much to do! And I can relinquish responsibility for about 23 tasks... which builds responsibility into the classroom AND keeps everything humming smoothly. I think we are at Day #112 at my school. At this point, there are so many things that happen without me thinking--or even asking.

For the list to make sense, you need to know that we have supply boxes on our desks filled with the supplies that we need throughout the day. If, for example, we needed scissors, and I was foolish enough to say, "Please get a pair of scissors for the next activity..."I KNOW there would be 34 sets of hands (that's 68, if you are counting!) grabbing for scissors. Even with warnings and pleas, I have seen this simple request turn into a nightmare. Now I say, "If you are sitting at spot 4, please pass out scissors to the people at your table." The table numbers reduce the scenario to one set of hands per table...and life goes on happily!

What else do we use the numbers for? Anything that needs to happen for six kids and can be accomplished with the help of just one. Just yesterday I am sure I asked...


And those are just the things I could think of at the moment. Because students have the responsibility for a week at a time, things fall into place quickly. Then I change the "big number" Friday afternoon, I announce it on Monday morning when we take on new classroom jobs for the week, and the responsibility shifts to the next number.

For years, I chose a student at each table by a descriptor such as: If you are the one with the most pockets, the earliest birthday, the tallest, the least tall, the one wearing the most colors, ETC. That's sort-of-fun for the first week... and then I find that all of that thinking takes more time than the lesson I have planned! Now I just say, "Number 6, please get a basket of algebra tiles for you and your tablemates," and we quickly transition to the next lesson.

Ahhhh. Contented sigh. I've been wanting to share this strategy for a while. Maybe you already do this and I am the only one tardy to the party. I think it work just as well in a small class (5 tables of 4, for example) because one of the benefits is that it limits the number of kids out of their chairs and reduces the number of students asking, "Can I help?"

I am glad I have this system in place. I know it has saved me plenty of time and more than a few headaches! Thanks for listening to me ramble on about it!

I am guessing you are now READY to hop over to your next stop...

Angela at the Daily Alphabet is talking about an easy math focus! Her blog is always filled with fun-to-read posts and I just know you are going to love her Bright Ideas about number sense. Just click on that cheery button below to take you there!

http://dailyalphabet.blogspot.com/

Or, if you are in more of a "random" mood at the moment, just click on any of the links below! Wishing you a wonderful time along the way as you meet some new bloggers and gather some great new "Bright Ideas"!

Thanks SO MUCH for stopping by! And thanks to Amy Alvis for the background paper!


Sunday, February 2, 2014

Here's a Bright Idea About Literature Groups

Welcome to the Bright Ideas Blog Hop! Okay, my idea is not be exactly bright. More than dim, less than blinding...

Let's back up a little. I am so (so, so, sooooooooooooooooo) excited to have been included in this blog hop! Do you know Shelley Grey from Teaching in the Early Years? Can you believe she put together a blog hop with well over a hundred participants? There are plenty of days when I can't find two socks that match and Shelley's got an entire blog hop under control! Can you hear my huge sigh of admiration?

This blog hop is a little different than some of the others. It's not about products or downloads or anything other than classroom ideas. We're all just hoping that you find this hop fun... and helpful!

http://secondgradesparkle.blogspot.com/2014/02/lets-talk-about-talk.html

Here's another thing that's neat about this hop: It's a lot of people from lots of grade levels talking about lots of different things! Hopefully every "hopper" will find at least one new idea. Look to your right! That's me hopping right beside you. I'm finding new ideas at every click!

I am sort of in a weird situation in BlogLand. While my students are sixth graders, we are at an elementary school. I am definitely not a middle school teacher. I am three billion miles from being cool enough to accomplish that. But I do teach "big kids," attitudes and all. And they are tweenagers, so I understand the middle school perspective (sometimes more than I would like to!) I teach all subjects (except PE--which is lucky for everyone involved, since I am completely lacking in coordination and I manage to trip over dust!). So I still consider myself an "upper elementary teacher." Sometimes I can't decide if I don't fit anywhere--or if I fit everywhere!

This year, I have readers working at a third grade level (and below) and I have readers working at a seventh grade level (and beyond). And most every stop in between too! We have a veritable three-ring circus going on in my room during the literacy block. In fact, it's a five-ring circus, because I have five groups with seven kids in each group!
http://www.teacherspayteachers.com/Product/Circus-Digital-Clipart-by-Poppydreamz-707632

I WISH I could do more guided reading with my groups because they need a lot of scaffolding, and encouraging, and, sometimes, just plain directing! And I want them to read real literature and have rich conversations. Alas, I am just one person with thirty five (mostly taller-than-me) friends.


Since I can't be in two (or five) places at once, I have tried to design a guided reading experience that happens... without me! Students run the groups themselves, but they follow a discussion guide that allows me to "shape" their thinking a little--without me being there with them.

In the context of Literature Groups (or Lit Circles or Book Clubs--funny how those labels seem to change periodically!), students work from prompts that I have provided as well as directing their own conversations and formulating and discussing the responses to the questions that they have written themselves.

As I said, I have five groups happening at the same time during the Literacy block... twice a day! At any given time you might see some combination of the following...
  • Guided Reading
  • Nonfiction Adventures
  • Word Work
  • Content Reading (Science and/or Social Studies texts that address our work in other areas)
  • Literature Group (reading)
  • Literature Group (discussion)
  • Reading work on the Computer
  • Writing work on the Computer
  • Researching in the Computer
  • ELD group work
  • Poetry Analysis 
  • or something new and/or unusual
Every group has a group leader. This person is responsible for getting the materials and keeping the group running smoothly. There is a score sheet to assess the time that the group meets with "call outs" at the end of that rotation.


As far as Literature Groups, my students are currently reading five different novels:
  • The Mouse and the Motorcycle
  • Sign of the Beaver
  • Sixth Grade Nickname Game
  • Tuck Everlasting
  • Wolves of Willoughby Chase

During the first rotation of Literature Groups, students read the designated pages, write a response in their Literature Notebooks and add some notes to their papers aid in their discussion. They also write a question or two of their own to further the discussion. I always tell them that Book Clubs is a time when arguing is a good thing if it is done in an appropriate way. We simply agree that we will disagree...and that there is not one right answer as long as you can bolster your thinking with evidence from the text.

Here are two excerpts from one of the discussion sheets from Tuck Everlasting. The questions do push the students into discussions. And there is a consistent reminder to support their thinking with textual evidence. There are also prompts for decoding words, for looking at fugitive language, for examining text structure and literary elements... if it's in the standards, it usually pops up somewhere! It's a bit like one-stop shopping. Click on the pic below and it should become large enough for you to read.


The best part is that students are reading novels at their own levels. They are participating in literary discussions about texts they can read. I tend to add a novel each year to my ever-growing cache of discussion guides, so I have a few to choose from depending on the level of my readers. And, each year, I find myself adjusting the guides just a little bit to meet the needs of the particular group of readers or my District's focus for reading instruction. It has been fun to watch the students grow as readers--and as debaters!

http://www.amazon.com/Notice-Note-Strategies-Close-Reading/dp/032504693X/ref=sr_1_1?s=books&ie=UTF8&qid=1391312826&sr=1-1 My students aren't quite ready to take on the task by themselves yet, and there is some specific teaching I am trying to infuse, so discussion guides are working for me at this point. If you haven't read Notice and Note, you might want to check out this book. The authors of Notice and Note offer another way to code text in order to facilitate discussion. Their approach is less labor intensive than the discussion guides that I use--and their strategies can also be molded into student-selected and student-led discussions. This book is a wonderful resource.


So here's your chance to HOP the Hop. Do you know Kate at Second Grade Sparkle? She is wonderful! She just switched to teaching sixth grade which is like finding a treasure for me! Kate's talking about talking too--and I know I am going to learn some great new things! Either way, she's waiting for you to hop on in so she can share her ideas for facilitating discussion (And while you're there, I hope you will get to see a picture of her adorable baby boy. What a cutie!) Just click on her button to get there...

Photobucket

Thanks for joining in on the Hop. I hope that I will see you here. And there. And everywhere!