Showing posts with label color-coded. Show all posts

Saturday, July 18, 2015

Matching Tablecloths and Tags to Organize Activities: A Bright Idea!

WOW! It's been so long since I posted something, I almost forgot how to BLOG! There are some big changes happening here soon. No... I'm not switching to WordPress. Perhaps I should, but Blogger is more my speed, at least for now. So, before August, you will see a new look--with, of course, lots of purple!

Today I am sharing a Bright Idea that I use with our end-of-the year activities. After thinking about it, and a comment from a colleague, it occurred to me that this is an idea that can be used at any time of the year. If you have groups of kids who need to make choices about activities, this is an easy organizational tip!


For this tip, you need several different colors of vinyl tablecloths--one for each game or activity. I get mine at Party City, but I've also seen them at Target and WalMart. You could also use colored butcher paper. You just need a different color for each activity you are planning.

You also need some name tags that allow for "inserts." Instead of name tags, you will insert colored paper to match the tablecloths. I've used the hanging kind (on strings), but you could also use the clip kind... as long as your kids can remove them independently.


Put a colored tablecloth on each table or "station." Decide on the maximum number of students you want to participate, and put that many tags at the station. In this case, we had three checker boards on the "red table," so we put out six "red tags" for six kids.


We used this system at our Game Day, one of the events planned for the fifth and sixth graders who were moving on to middle school. We had sixty kids in the auditorium and twelve different stations. Ten were at tables and two were on the stage--Legos and Jenga. And each station had a different colored tablecloth and matching set of tags.


As the students came into the auditorium, I assigned them to one of the four corners of the room. I told them I would look for the quietest group to determine which group would choose an activity first. This was a great motivator for good behavior! Students could sit at any of the twelve stations, as long as there was still a tag available.

I was surprised to see that the "chess table" was filled on each rotation.  See how the tablecloth matches the tags? 


The students were reminded to be welcoming to everyone who joined their table.  We had kids blended together from different rooms, including some students who were deaf. It was heart-warming to see how they made things work. We had interpreters to sign, but many groups just figured out how to communicate in the context of the game.

The students played for twenty minutes and then I rang the chimes. This signaled that they needed to clean up the area, and restore the game to be ready for the next group. Tags were removed and placed back on the tables and the kids returned to their waiting places... knowing that they would be able to choose another game as soon as they were quiet.

Here's the "green table" ready for a new group. One group had already played and they had organized it for the next set of kids to play.
(Don't even get me started on how unhappy I am that I took this picture with the word, "Monopoly," upside down. I tried rotating it, but then it looked like it was flying, so I had to go with "not upside right."  Sorry!)


There was a variety of different activities so that everyone could find something they enjoyed. We had puzzles and Legos and CandyLand and chess. We had partner games, team games, whole group games and games you could play independently--in a group. Some kids chose the same activity two rounds in a row, but most chose different games at each rotation.

The Mancala players were sitting at the "blue table." There were five kids in this rotation.The kids figured out (on their own!) that the waiting player would simply rotate in each time a game was completed! I didn't think of this, they did!


One of my favorite games is Blokus. It's a little like an off-skew Tetris morphed into a board game... with multiple players. Fun! These students were playing at the "silver table." Many kids found a game they had never played before. And some of the teachers and parent volunteers found games they wanted to buy to play at home!


I have accumulated a lot of games over the years. Some years, I have also had kids (and colleagues) bring games from home to provide variety. I was amazed at how the kids cleaned up their tables so perfectly. Every table stayed intact--except the table where the kids (and sometimes the teacher) were playing Spoons. That tablecloth looked a little tattered when we--I mean they--were finished.

Silly me, I forgot to get a picture of a child WEARING a tag. You can almost see the tag on this student. But I promise, it's light blue to match the light blue tablecloth.

Management was so easy: Wait quietly so that your group can be selected to choose a game. Sit only at a table where there are still tags available. Be kind and welcoming to all players. Stay at the table until the rotation is complete. Clean up when the rotation is over. EASY! As I mentioned, we had sixty kids playing for two hours--and there were NO behavior issues. The room was controlled and cheerful, and I went home without a headache! 

I think this tag-and tablecloth strategy could be used for any collection of activities where students have a choice of activities across a few (or more) rotations. Art projects? Social studies activities? Science stations? STEM tasks? So many possibilities!

Speaking of possibilities, each of the bloggers listed below is sharing a Bright Idea. Just browse through the link-up and find a topic or a grade range that interests you. It's like a bloggy buffet! I'll be perusing the links too--I'll wave if I see you!

Thanks for visiting!


Saturday, January 17, 2015

A Bright Idea: Color-Coded Supply Organization!

WooHoo! It's time, once again, for the Bright Ideas Link Up... , a "commercial free" (no store links) collection of teacher-approved ideas for the classroom. I love the Bright Ideas Link Up--I enjoy spending Bright Idea Saturday morning sipping my coffee and gathering ideas to make my life easier!


I am always looking for ways to keep student supplies organized so that I don't have to run around saying "I found a pencil! Which table is missing a lime green colored pencil?!"

In my classroom, I have six table groups with six kids at each table, and there is a limited amount of space with binders, reading books, etc. We keep our textbooks on the bookshelves and we don't use the "inside" of the desks (The tables are turned around so there is no access). I don't like the way things accumulate in desks and I can't keep up with the organization necessary to support kids in keeping their desks clean. Further, we change seats throughout the day, so I need all of the supplies to always be available--no matter where students are seated for an activity.

So, we use a community supply box for the whole table. I have shared about my "dotted supplies" before...


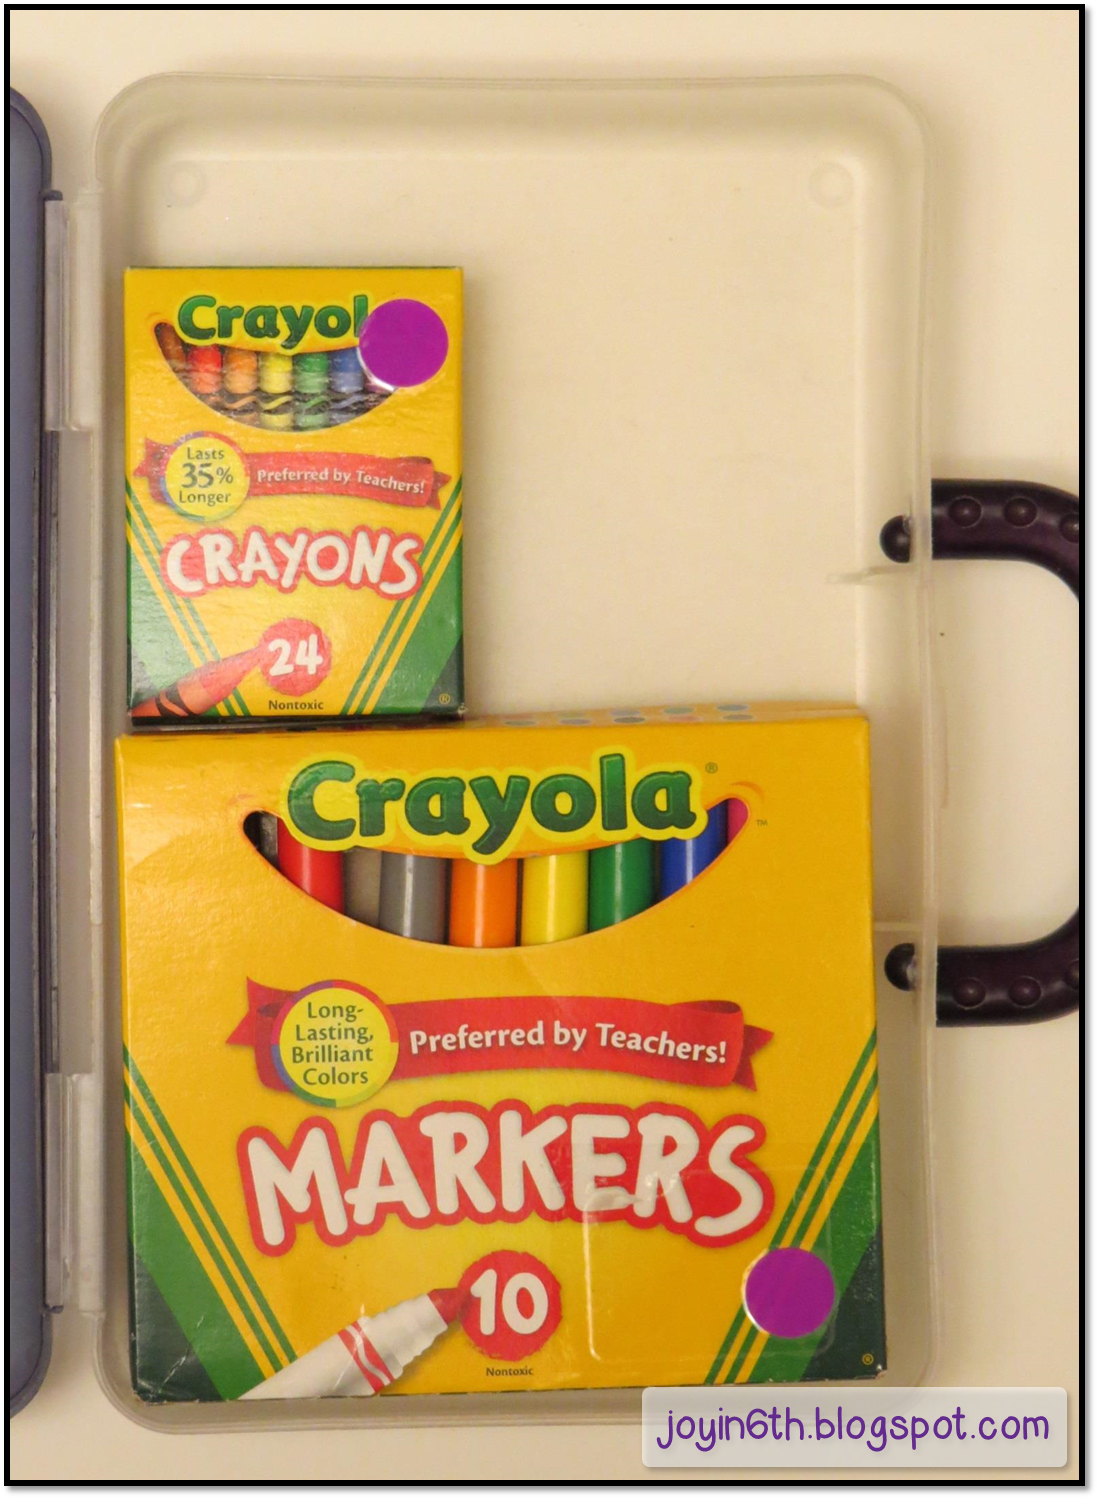
Each table has a color, and the markers and colored pencils have dots on them. The box is dotted too! It makes things so easy to organize! (I don't dot the crayons.) My favorite time to add the dots to markers and pencils is on a road trip during the summer. It's a good way to pass the time, and the task is accomplished quickly while enjoying the scenery (I guess I should specify that this only works when I am the passenger!)


But the system is actually bigger and better. It's no secret that I am a little over-the-top when it comes to organization. (That almost makes my obsession sound like a positive trait.) You have to have matching scissors to make a system like this work. I've used a loop of paper with the dot on it... and I have chosen not to dot scissors at all. This year, everything just fell into place.

Here's what it looks like from the bottom to the top...

I use Rubbermaid snap-cases because they stay closed and stack easily. There is plenty of both lined paper and unlined paper in the bottom of the box. Kids rarely have to get up to get supplies if everything is right there within reach. (YAY! Happy teacher!)


There are six rulers. Some years I go with multiple colors... This year, I went with a one-color-per-box design. Obviously, I am going to be showing you the purple table box... Did you guess it is my favorite?


They have markers and crayons...


There are three glue sticks (partners share) a stapler and a tape dispenser. That "old fashioned film canister" (Am I THAT old?!) is filled with paper clips.


Finally, there are colored pencils and scissors. This is what the supply box looks like when you open it...


And here is what it looks like when it's closed.


Here is the "purple box." This sits in the middle of Table 4.


And here's why I love this system...
1. Everything is RIGHT THERE. We don't lose any time trying to find things. (No wandering necessary!)
2. It is SO easy to maintain. We have table captains that change each week. When it is your week, the last thing you do at the end of the day is check to make sure that your table box is organized. This is the time to refill the paper supply, or to ask for more staples.
4. Everything fits. One of our first "management lessons" during the first week of school is practicing the placement of items in the table box. We empty the box and work together to fill it correctly. Students now put things away without having to think about where each item goes.
5.  "Lost" items are reunited with their homes quickly. Kids know the box color for their table. I always chuckle (quietly, of course), when I hear a student say something like, "The green table is missing a ruler..."
6. It's pretty! I know that's not a very educationally sound reason for choosing an organizational system, but it does make my heart happy!
7. It has taught my kids self-management and cooperation. They know how to keep the supplies organized... and the communal nature of the supplies necessitates sharing. Table captains are responsible for passing out supplies for a lesson and keeping the box organized. And everyone gets a turn being responsible for the upkeep.
8. It works for us. I've used the same system for over ten years with very few adjustments!

Okay, that's probably more than enough gushing over matching scissors.

There are SO many Bright Ideas in this Link Up, you are going to need a second cup of coffee! Look at the little pictures below and choose by grade level or blogger or Bright Idea. I'll probably pass by you along the way.

Have fun! Thanks for visiting!


Thursday, August 8, 2013

27th Day: Color-Coded Boxes for Storing Materials

Well, if you've read any of my other posts, you'd think I have some serious OCD tendencies. And you would be right! Oddly, these very tendencies keep me only half organized. I like to have things organized, but that takes a long time. So, often, I end up in this terrible cycle between hyper-organized and completely chaotic--or, if we're working on a positive spin that day: "awaiting organization."

When you have been teaching for nine million thirty years, you accumulate a lot of stuff. I honestly think that happens because we often have so little, we will take anything we can get. If it is not a continuous process of purging, you end up with what most teachers experience all too quickly: Materials Overload!

In an effort to keep things at least "categorized," I have turned to "the colored bin system." {Insert major shout out to my friends, Office Depot and DJ Inkers clip art!}
I know, without using much brain power, that if I need to find the books, activities and materials for teaching about decimals, there is a good chance they will be in a blue box.  Math materials always usually are supposed to go in the blue boxes. When all is right with the universe, you might even find those items in a labeled box, probably something with "decimals" on the label.

Imagine the opening to a scary movie... "Da da da... What you are about to see may be shocking. You may wish to avert your eyes..." If I showed you my garage, you would hear screaming! As I have chronicled before, that space remains less-than-organized. But in the midst of the tumult, you will find some gems of organization... all thanks to those covered bins!

So, here's a bit of evidence to show my system. It is definitely a work in progress. If all goes well, I will have everything in place in a few years... right before I retire!

I took a picture of two boxes from each "collection." I'll leave it up to your imagination to determine how many more boxes are not photographed. Here goes nothing..

Science materials...


Math Materials...


Writing materials...


Reading materials...


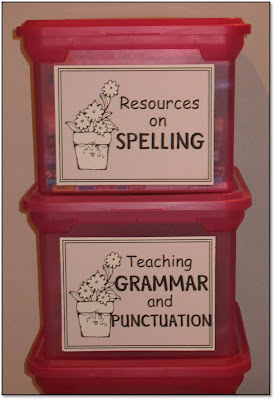
Oh, how I wish everything was put away and that I could find anything that I needed just by peeking into a colored box. Alas, that is not true. There is more than one bin labeled like this...


And, as of this summer, there's a new bin in town...


So, that's my system! As long as things make it to the right colored bin, I have half a chance of finding them. And, even with the attempt to go paperless, there are still rock samples and props and treasured picture books to support learning. In other words, there may WILL always be stuff to organize and store!

How do you keep your materials organized? Any tips or tricks that you have found useful to ensure that you find everything you need?